Aug 20, 2026
How to Choose the Right Custom Pop-Up Canopy for Your Brand Event
Choose a custom pop-up canopy by event footprint, frame, fabric, walls, anchoring, setup and transport needs. Use this buyer guide to reduce event-day risk.
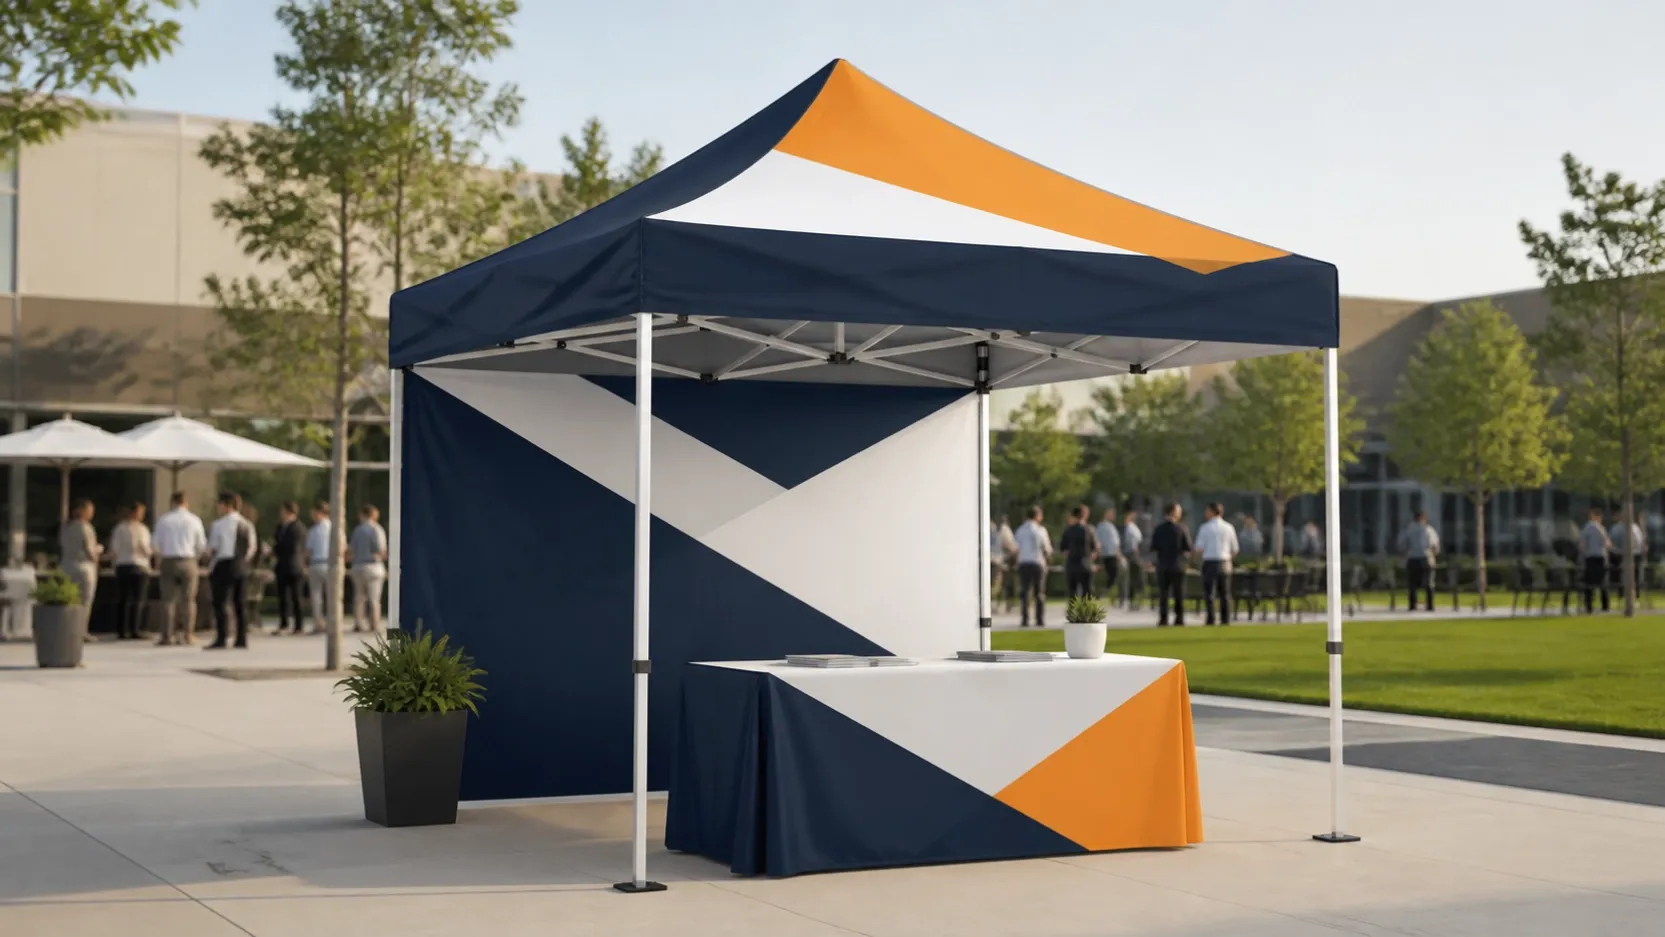
Choose a custom pop-up canopy as a complete event system, not as a printed roof ordered separately from the frame, walls, weights, transport bag and venue requirements.
Start with the event job, available footprint, audience flow, setup crew, venue surface and reuse plan. Then compare the frame, printed fabric, wall layout, anchoring, packing and replacement-part strategy before approving a quotation.
Quick decision checklist
- Event objective: shelter, registration, sampling, product display, sales, hospitality or a complete brand activation?
- Footprint: how much room is available for staff, products, furniture and visitor circulation?
- Frame: what are the actual material, profile, wall thickness, joints, packed length and replacement-part options?
- Printed fabric: what material, print coverage, proofing method and color reference will be approved?
- Walls: should the space remain open, use a back wall, guide traffic with half walls or create an enclosure?
- Anchoring: what does the venue permit on grass, concrete, asphalt or an indoor floor?
- Portability: what are the packed dimensions, total kit weight, bag type and recommended crew?
- Repeat use: can roofs, walls, connectors and other parts be reordered against a recorded system?
1. Start with the event job and venue constraints
A canopy that works for a weekend market may not suit a multi-city roadshow, sports activation or indoor exhibition. Define what the space must help the team do before choosing a footprint.
- Shelter staff, guests or products.
- Create a visible registration or information point.
- Support product sampling, sales or demonstrations.
- Provide privacy, storage or a controlled service area.
- Coordinate with flags, table covers, counters or backwalls.
- Travel repeatedly between venues with different surfaces and rules.
Record whether the event is indoors or outdoors, the allocated area, ground surface, height restrictions, access times, audience flow and any fire-safety or anchoring requirements. Documentation requirements vary by country and venue, so confirm the exact rule before production.
2. Choose the footprint by workflow, not only by available space
The right footprint is the smallest configuration that performs the required job without blocking staff movement, visitor interaction, product access or safe anchoring. Common market labels can help with early planning, but the quotation must use the supplier's confirmed dimensions and component data.
- Compact format: useful for a small information point or narrow allocation; check that furniture and wall hardware do not consume the working area.
- Standard booth direction: useful for a registration, sampling or vendor station; test the layout with tables, stock, staff and visitor circulation.
- Wider activation direction: supports two activity zones or broader product presentation; confirm packing, crew and wall segmentation.
- Double-width direction: supports demonstrations, hospitality or team operations; plan additional handling and anchoring requirements.
3. Select the frame by duty cycle, transport and replacement strategy
The phrase 'heavy duty' is not a complete specification. Compare measured frame information and the expected use pattern instead of choosing by material name alone.
- Frame material, profile and surface finish.
- Leg shape, measured cross-section and tube wall specification.
- Joint, foot, slider, pin and connector construction.
- Total frame and printed-fabric weight.
- Collapsed length, height settings and clearance.
- Replacement-part codes and continuity of the frame series.
- A setup demonstration using the quoted configuration.
Steel may be considered when initial budget and a heavier frame feel are priorities. Aluminum is often considered for repeat transport and corrosion resistance. Neither is automatically better; profile, wall thickness, joints, weight and serviceability decide the practical result.
4. Evaluate canopy fabric, printing and brand-color control
A useful soft-goods specification should state the approved fabric construction, coating, print method, seam treatment, fastening method and care requirements. Fire-safety and water-performance wording must match the selected material and available evidence.
- Approve the roof and valance artwork layout.
- Approve sidewall artwork, print direction and panel names.
- Protect safe zones around seams, zippers, windows and fasteners.
- Confirm the logo version, color reference and proof method.
- Check URLs, QR codes, dates and campaign-specific text before production.
- Label panels so the correct roof and walls are packed together.
Water-resistant, waterproof and seam performance are different claims. Use only material-specific, tested wording for the exact configuration being quoted.
5. Choose the wall layout around customer interaction
Walls change access, privacy, airflow, weather exposure, product security and the way visitors interact with the team. More printable fabric is not automatically a better event layout.
- Open canopy: maximizes access and visibility for sampling, open displays and busy walkways.
- Full back wall: creates a clear brand background for registration, demonstrations or photo areas.
- Half side walls: guide traffic while keeping the booth approachable for retail conversations and sports events.
- Full side walls: add enclosure, privacy or storage but may reduce airflow and openness.
- Door or window wall: supports controlled access, a service opening or ventilation; artwork and hardware must account for the opening.
Choose walls by mapping where visitors enter, where staff stand, where products are displayed and where the primary message must be seen.
6. Plan anchoring, weights and venue compliance before the event
A portable frame still needs an approved anchoring plan. The correct method depends on the surface, frame, footprint, wall configuration, exposure and venue rules. Full walls can change how wind acts on the system and must not be treated as decoration only.
- Grass or soil: confirm ground conditions, venue permission, buried services and compatible stakes or approved alternatives.
- Concrete or asphalt: confirm permitted weight bags, plates or other ballast, plus trip-risk controls.
- Indoor hard floor: protect the floor and maintain aisle and emergency-route clearance.
- Multi-site roadshow: document the approved anchoring kit for each surface instead of assuming one method fits every venue.
Do not rely on a universal wind rating unless valid testing covers the exact frame, canopy, walls, anchoring and setup conditions. Follow venue procedures and remove temporary displays when conditions become unsafe.
7. Verify setup, portability and human-friendly use with evidence
Terms such as fast setup and portable are useful only when the supplier can support them with configuration-specific information.
- How many people are recommended for the selected footprint?
- Can the system be assembled without specialist tools?
- What is the longest packed component and total kit weight?
- Does the carry bag have wheels or separate compartments?
- Are the roof, walls, hardware and weights labeled as one kit?
- Which small parts should be ordered as spares?
8. Build a complete event branding package, not an isolated tent
The canopy defines the branded zone, while supporting displays help visitors find it, approach it and understand what happens inside. Use one approved logo, one color reference, coordinated typography and a clear message hierarchy across the complete kit.
- Feather or teardrop flags for entrance marking and longer-range visibility.
- A table cover or portable counter for registration, sampling or customer interaction.
- A roll-up banner or fabric backwall for more detailed campaign information.
- Lighting when the application, electrical standard and venue permit it.
- Compatible weights, carry bags and spare parts for repeat deployment.
9. Evaluate repeat-order and quality-control records
For distributors, agencies and multi-event brands, repeatability can be more valuable than a one-time low price. The supplier should preserve the frame series, canopy pattern, wall dimensions, fastening positions, artwork version, packing plan and spare-part references.
- Incoming frame and fabric checks.
- Artwork and color approval records.
- Roof, valance and wall measurement checks.
- Frame opening, locking and height-adjustment checks.
- Wall and hardware compatibility checks.
- Print, sewing, zipper and fastening inspection.
- Kit completeness and carton-label verification.
10. Send a complete RFQ for a comparable quotation
A quotation cannot be compared fairly when the footprint, frame, walls, print coverage and destination are unclear. Include the following information:
- 1. Event type and intended application.
- 2. Venue allocation or preferred footprint.
- 3. Indoor or outdoor use and surface type.
- 4. Quantity and expected reorder plan.
- 5. Frame preference, if known.
- 6. Roof, valance and wall print coverage.
- 7. Open, half-wall, full-wall, door or window configuration.
- 8. Anchoring or weight requirements.
- 9. Carry bag, spare parts and packing requirements.
- 10. Artwork files and color references.
- 11. Destination and required in-hand date.
- 12. Sample, proof or pre-production approval requirements.
Frequently asked questions
What size custom pop-up canopy should I choose?
Choose by venue allocation, team workflow, products, furniture, visitor circulation, transport and setup resources. Compare actual footprint and packed dimensions rather than relying only on a popular size label.
Is aluminum or steel better for an event canopy?
Neither is universally better. Compare the actual profile, wall thickness, joints, weight, finish and replacement parts for the expected use frequency.
Should I add a full back wall or half walls?
Use a full back wall for a strong branded background or separation. Use half walls to guide visitors while keeping the booth open. Decide from customer flow, privacy, airflow and message direction.
Does an outdoor canopy need weights or stakes?
Yes. Outdoor use requires an anchoring plan matched to the surface, frame, walls, exposure and venue rules. Confirm the approved configuration before the event.
What information is required for an accurate quote?
Send footprint, quantity, frame preference, print coverage, wall layout, surface, anchoring needs, packing, artwork, destination, required date and sample requirements.
Build the event space around the buyer journey
The right canopy should fit the venue, support the team's work, carry a clear brand message, pack efficiently and arrive as one compatible kit. Send BESDA your event footprint, venue surface, quantity, artwork, wall requirements and required date for a project-specific configuration review.